
Remember how I was thinking about the styling options for the rattan swing chair in the girls' room? My original intention was to recover the gross brown cushion that came with the chair, but when I settled down to do it, back around New Year's, I discovered that the foam inside was disintegrating. I was feeling all cocky and I decided to use the denser foam left over from making the girls headboards to do something custom, and went to work cutting two half circles, using spray adhesive to attach them to one another, and using a kitchen knife to shave down the edges so they'd be rounded. So far, so good. Next, I traced two circles in the fabric and three long strips the width of the foam, plus a seam allowance.

Look how confident I was feeling: I started taking photos to document the process, for a little tutorial, I suppose. If I had looked for a tutorial in the first place, from someone who knew what they were doing, none of this would have been a problem.
 I didn't want to worry about the pattern being mismatched from the circles to the strip along the edge, and there was no way I was piping this thing, so I had the genius idea to gather the strip for a super-cute ruched effect. So I sewed three strips together and hand-basted both sides and created this long worm of a ruched side section.
 I pinned it to one of the circles, sewed it together, feeling good. Well, it was when I started to pin the second circle to the whole thing that I realized the problem: there was no way I was getting the foam inside the cushion once it was all put together.
 And there was no way I was getting the whole thing stitched closed, with all that fancy ruching. And I wasn't about to inset a zipper.
And then it dawned on me: I wasn't trying to make a little cushion, I was trying to upholster one. It had seemed so clear in my head, you know? Until I realized I had it all wrong.
Okay, weeks pass. Yesterday I finally decided to take the disaster apart and just copy the original cushion, like I should have done in the first place. I pinned the two circles with right sides together, sewed most of the way around, turned it right side out, stuffed it with the leftover batting from the headboard project, sewed the opening closed, and tufted the cushion in four places just like the original. And it took, like, half an hour? Or less? Like what I should have done in the first place.
Only.
I brought it upstairs, feeling all good about it even though the circle was a little lopsided because I got a little sloppy (which can happen on the second go-round), and tossed it into the chair.
And.
It was Too. Small.
 I never re-measured! I didn't even think about the different construction of the two pillows, just went ahead making assumptions. It doesn't look so bad in this picture, but I have it centered--if you push it back (and little girls climbing in will inevitable push it back), you have several inches of rattan showing at the front. But there was no fabric left. And, of course, seeing it in there I LOVED that fabric there. And the whole point was to do something for no money, so buying more of the fabric wasn't an option.
Enter project number 2.
One day a while back, Clio had grabbed her pillow off her bed and put it in the chair, reminding me that sometimes function will simply reveal itself. It just so happens that I had a plain white sham that came with the girls' duvet sets, and a huge spool of green grosgrain ribbon that I bought years ago at the Manhattan Antiques show. So I set to work customizing, thinking, again, what a simple little project this would be. I laid out the ribbon approximately how I wanted it to be.
 Measured in from the sides for an even line. Drew it all around.
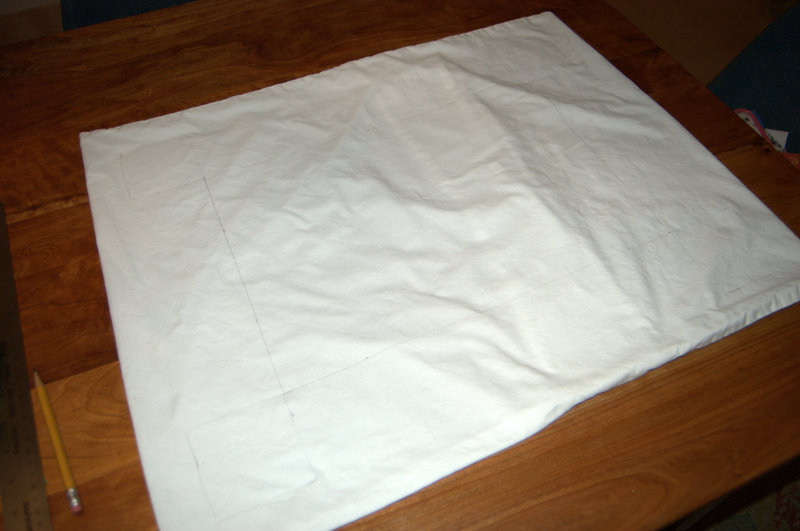 Used a spray adhesive to attach the ribbon. Easy, right?
Wrong! After the 24 hour cure time, the ribbon just fell off the pillowcase, just a bit stiffer, as if the adhesive was starch. That was all around New Year's, too. I guess I was feeling ambitious....and then squelched.
Fast forward back to yesterday, when I realized that the back pillow would solve the problem of the too-small seat cushion, so I dug out my second failed project, determined to do it right. This time around, I got some fabric glue, used for hems, etc, and used that to attach the ribbon. It was a mess to use, and thus no photos, but once I got the ribbon on, mitered corners and all, I covered it with brown grocery bags, put some heavy books on top (oh, the perks of being an art history major!), and when I came back this morning the ribbon had actually adhered. I used the sewing machine to tack down the mitered corners (and only once sewed the case closed), and...done.
This would have been a lot easier to do on a piece o fabric before it was configured into a sham, but then, I suppose, I would have had to make the sham. And nothing slows down a project like changing the thread color on the machine.
I took it to the girls room, threw it on the bed, and liked it so much I thought I was going to have to make another one for the other bed.

Luckily, I also like it in the chair. And I especially like the way the two projects worked out, together.
 Cute, right?
I'm slightly less fond of the fact that a 1-2 hour set of projects took 5-6 hours, plus 6 weeks. (Though, to be fair, I might have had less of a problem the first time around if I hadn't been multitasking--er, watching Damages--at the same time.)
But all's well that ends well, and I probably learned a lesson or two, too.
I hope this makes any DIYers out there feel better about their own moments of idiocy (you have had them right?)
Have you had them? Do tell.
It makes me feel better that other people do this sort of thing - the one where you're sure you know what you're doing so you jump right in without double-checking.
ReplyDeleteI make my (and my husband's) costumes for the MN Renaissance Festival and at least once a year I sew a sleeve on inside out (or some other bonehead move), simply because I'm not paying enough attention or because "I don't need to check the pattern because I've done this before".
-Ren.
Ha! All the time! My basement is full of them. I usually get so frustrated that I throw them down there and eventually get back to them months later.
ReplyDeleteGood for you for sticking to it. I'm a big believer in mistakes. I can;t stand them, but I love them at the same time. I learned more from them than any class I ever took.
Looks great!
xx
Danika
nicely design and well experienced
ReplyDeletedorm bedding