Showing posts with label curtains. Show all posts

Wednesday, June 4, 2014

Visualizing (isn't my husband helpful?)

I am trying to be thoughtful as I complete the final projects around my house that will hopefully (oh, please, dear god!) let me feel finished.  For now.  Among other things, this means not doing things that can't be undone if I am not 99% sure that I will love it.

Case in point.

I have been wanting to give my master bedroom the canopy treatment, much like I did for this client:


This is what the room looks like now, more or less:


I like the idea that a cornice-and-curtains treatment would soften the room in lieu of panels on the windows and balance the height of the gallery wall, across from the bed.


I have left over white linen curtains that didn't get used on a project, and some yellow fabric with a small scale print that I have been dying to use again.

I should just do it up, right?

Except.  

The bed wall is one of the first things you see when you come in to the house (and, for that matter, it is what you see from the street when the shades are up).  We kept the paint from the previous owner, and I don't know the color.  All of this means that if something goes up that requires putting holes in the walls, it is not coming down.  The last thing I need is to repaint this large room because I changed my mind about a little canopy and couldn't cover the holes.  (Though that sounds just like me, doesn't it?)

Enter the husband.


Not sure I like it all the way at the ceiling...how about lower?


But of course the mirror would still hang in front of the curtains.  How does it relate to the cornice?


Some days he is a good sport.

For today, we did not put holes in the walls.  I still like the idea, but the execution needs some thinking.  Fuller curtains?  Narrower cornice?  Valance instead?  With the high ceilings, proportion is key.

What do you think?  Should I tweak this idea or abandon it altogether?


Friday, April 11, 2014

Embellished

Sotheby's showhouse via lonnymag.com

Where oh where has this week gone?  

In between massive amount of work for my volunteer committments, design presentations, and new client meetings, I am still thinking about finishing.  up.  my.  house.


In the living room, I need to finish sewing the white curtains (Ikea ritva's that will get doubled and pinch pleated), and I am always going back and forth on embellishment for them.  I love the crazy modern-art aspect of the embellished curtains above.  They are almost like sculpture!  Perhaps I should focus on getting the panels sewed in the first place...I have been living with hug puddles of fabric on the floor for going on three years....


Tuesday, April 23, 2013

Triumph!


Once daylight savings set in, and before Minnesota returned to a state of perpetual winter (a winter storm warning is in effect and another 4-6 inches of snow is predicted as I write this, on APRIL TWENTY-SECOND), there was a brief moment of evening sunshine.  This was so very lovely, with one little problem: my children would not go to sleep because their in-progress window treatments let in all that light.

And so, last weekend, I finally made a pair of light-blocking draperies.  People, let me tell you, if you have ever been knocked over in shock at the price of custom draperies, you just need to make yourself a pair to understand, and you will never complain again.  Promise.  (Well, you might complain, but you will know you are not being ripped off.)


Mine are only a single fabric width, only because I bought this fabric a dozen years ago and I didn't have any more.  I used black-out liner, and that business is HEAVY.  I used this tutorial for lining, but made my own pinch pleats instead of using pleat tape.  As it turns out, pleat tape is basically useless if you want any control over the spacing of your pleats--which you do if you want them to fit the window properly.  And if you're going to all this trouble, you definitely want them to fit your window properly.


What this means is that when the draperies are closed, they overlap about 2 inches in the middle, and the return at the outside ends is the right size to actually wrap around the side of the window and touch the wall.

I chose a butterfly pleat, which seems sweet for a girls' room, don't you think?


For the drapery rod, I used this one from Allen + Roth at Lowes, which I blogged about here.  I love the look, and it was very easy to customize the length--my husband just cut off about a foot section and drilled a new hole for the finial.  My big complaint is that the rings do not maneuver smoothly on the rod, and for curtains that get opened and closed daily, this is a problem.  That said, I got the rod, rings, brackets, and finials for $50, about 1/4 to 1/8 of the price of something similar from a higher-end custom line.  So in the future, I would consider using the slightly narrower pole with these rings.

Noe I jut need to revisit the beds.  I've been thinking about tufted headboards in white, natural, or blush pink linen.  But then today I saw these.


Love the shape.  Painted white, I think.

What say you?

Monday, May 7, 2012

tassel on, tassel off


You know how I love the trimmings.  (Oh, you don't?  check here here here here and here.  You kind of have to scroll down in that last one, but it brings you to my first experience with fringe.  Sort of a gateway drug.)

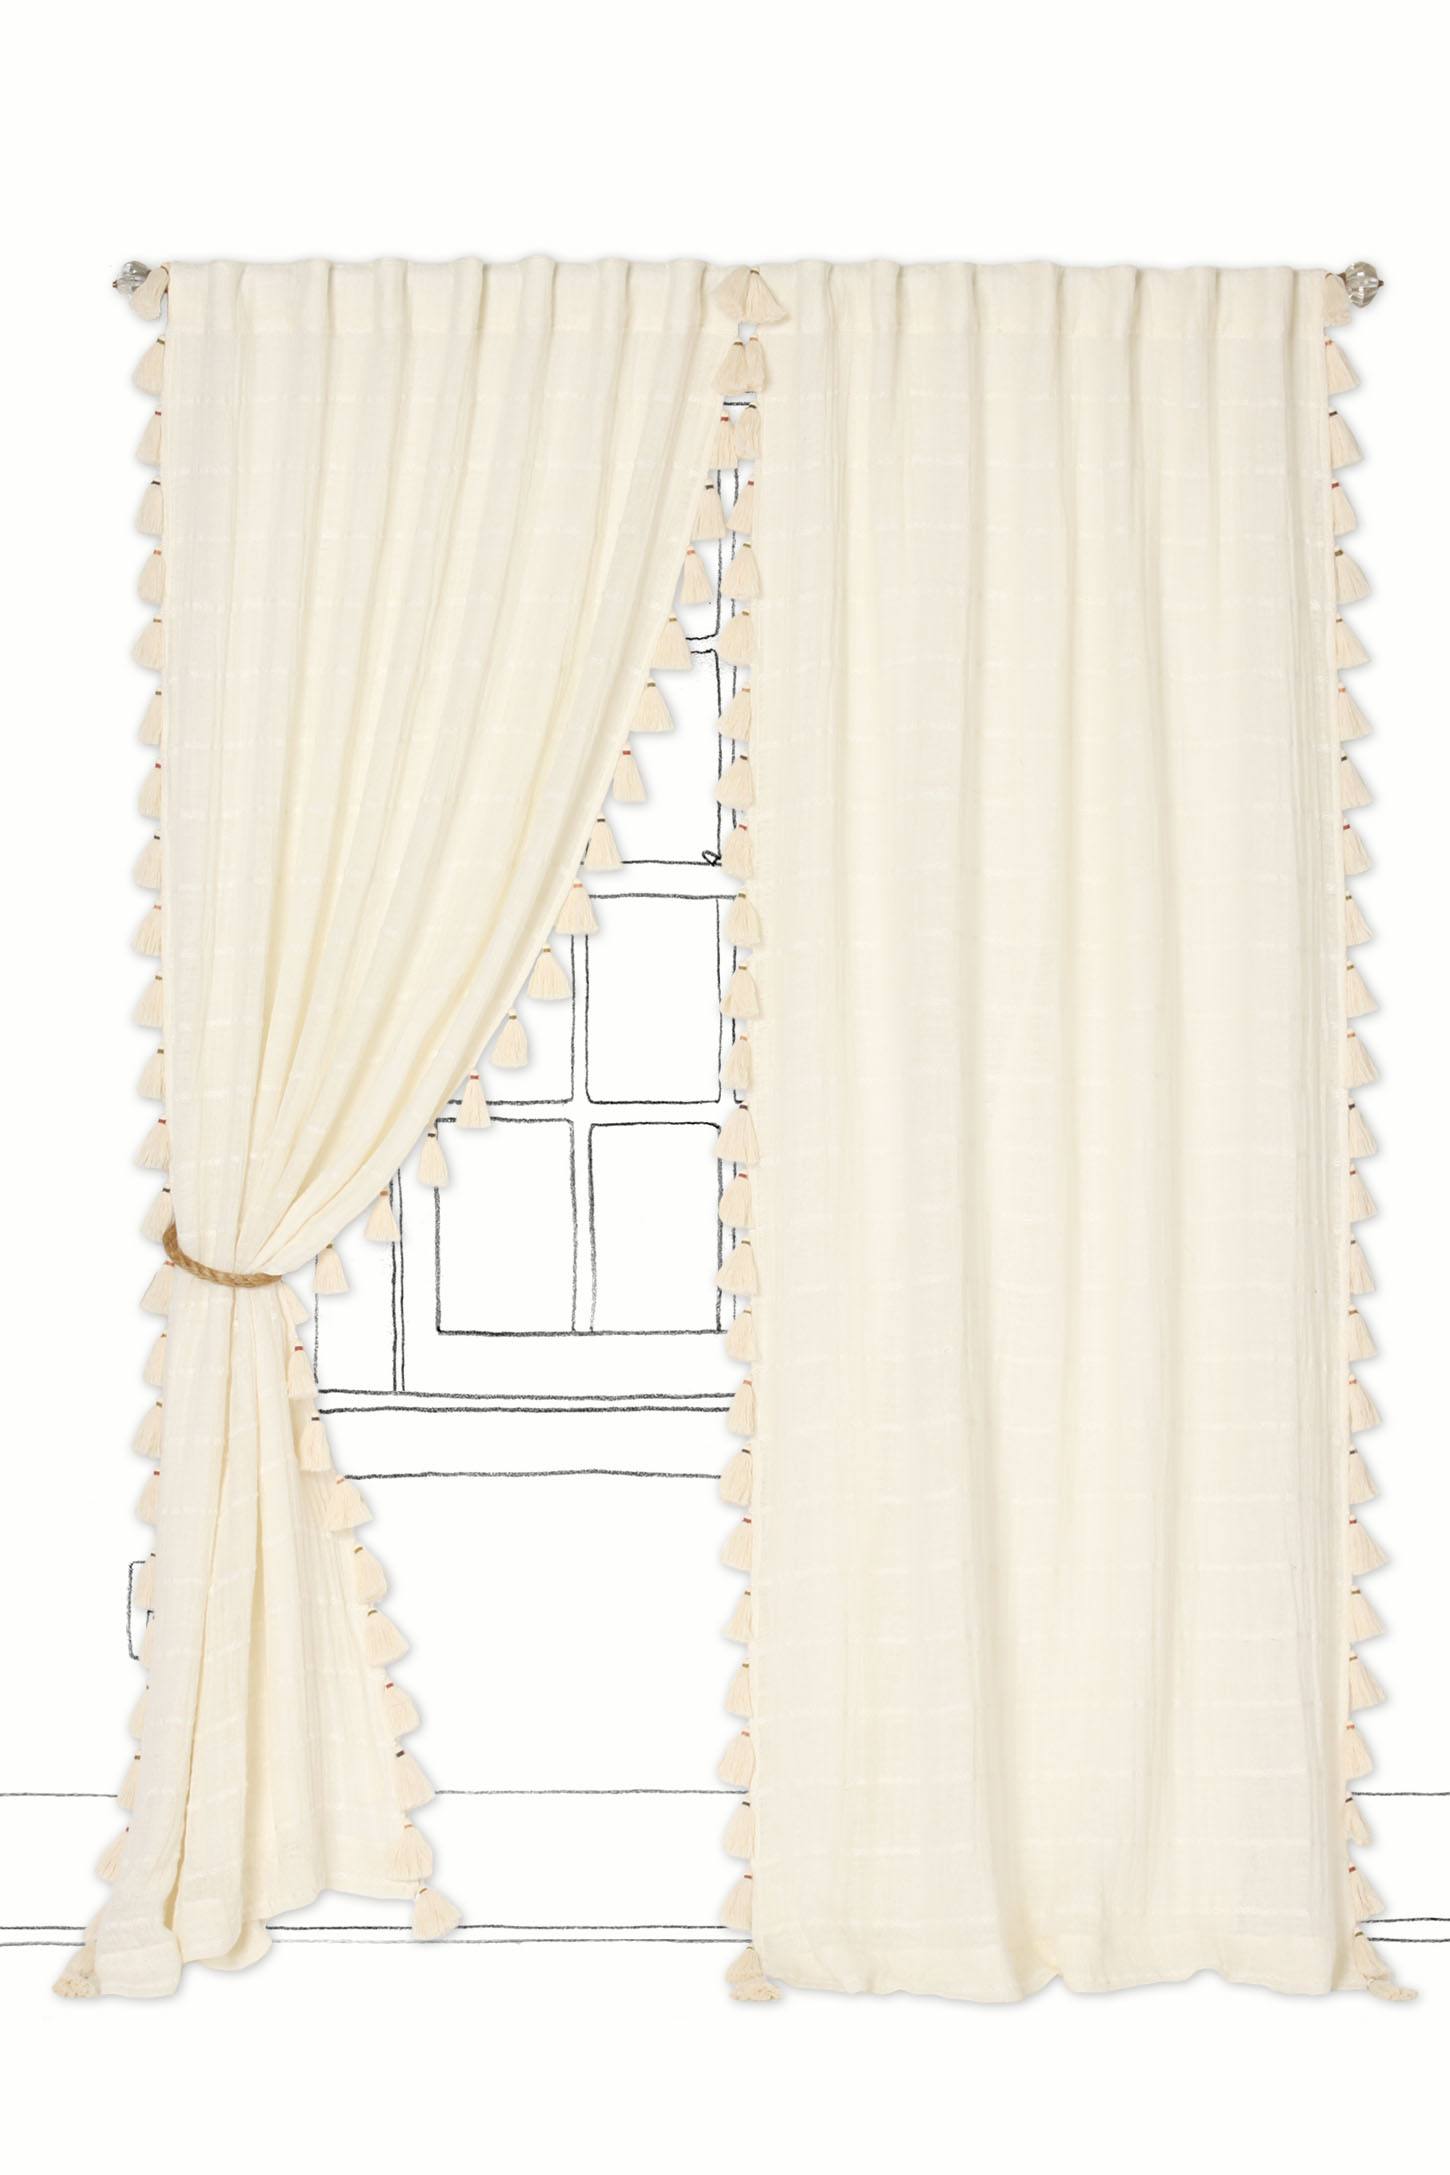
Well, it is all I can do not to add tassels to both edges of my plain white living room curtains, a la the Chino Canyons from Anthro.  You know, the ones I chose BECAUSE THEY WERE SO PLAIN and simple.

Anyway.  Do you kind of love them?  If nothing else, they seem aptly named.  There should be a cactus in the room with them.

Friday, September 2, 2011

Put Some Trim On It

Not too long ago, I was hanging out at my brother and sister-in-law's house, and looking around, I felt very settled: everything in their space just feels finished.  This is, I think, partly because they have been int he house for about 10 years and partly because they run Union Place, a home theater and design shop in Excelsior, Minnesota.  While their taste is much more traditional than mine, their facility with layers and details can apply to any decor.  The fringe on my niece Lucia's curtains was one of the inspirations for the tasseled trim in my girl's room.

My favorite fabric store (well, discount fabric warehouse, really), happens to have a sale right now--all decorator trims are 50% off of the already insanely good prices.  (Get the coupons on their website, print 'em out and put 'em to good use.)  I'm trimming the life out of the curtains around here.

I love this tape trim for the dining room.


It has the chartreuse, picks up the raspberry from around the house and that hit of black will give some drama.  This is going on the leading edge and then--who knows--maybe I 'll add it to the outside as well.


This raspberry trim is very close in color to the guest room curtains--I love the way it almost reads as lace.  I'm thinking leading edge plus bottom hem, to sweep the floor.

Then there are these, possibilities for client projects.  A couple of fun things in the works.


And how about that orange and green leopard print?  It's fully reversible so you can choose which is the pattern and which is the ground, and it was a remnant, just $6/yard and the piece is 2 1/2 yards.  I'm thinking headboard.  I just don't know for who.  Yet!

So I guess I'll be doing a little sewing this holiday weekend.  What about you: what do you have planned?

Monday, August 15, 2011

On the Fringes


One of the things I love about my current work situation is the variety.  When I get a little burned out on design work, I can write a blog post.  If I need something concrete, there is always book keeping.  I happened to have 3 or 4 projects all in the conception stage at the same time, which is incredibly fun, but it also left me feeling the need for something a little more tangible.  I wanted to make something, to do something, to see an end result now.

So I made some time and knocked a couple of items off my own project list, and I'm feeling great.  Nothing big, just small signs of progress under my own two hands.  I'll share some with you this week.

First up, you may be tired of seeing the girls' room, but here it comes again.

It's completely counter-intuitive, but moving in to this modern house with simple lines has brought out the traditional girl in me, and I have not only done more floor length draperies on a per-window basis in this house than any previous house, I have also found myself drawn to more formal trappings like pelmets and fringe.  I think it might be a desire to layer in details to a house with minimal architecture.  With a limited budget, I've mostly left out this particular finishing touch (the navy blue Ralph Lauren silk tassel trim I wanted for the guest room curtains was $30 per yard even at my fabulous fabric outlet.)  But after finding just the right trim for $8/yard, almost a quarter of the price of something similar at, say, JoAnn's, I decided to go for it.

Here are the curtains most recently "before"


And here they are after.


I love how the tassel reinforces the three dominant colors in the room--the green, pink, and yellow--but leaves out the blue.  I also like how finished the treatment looks, and how playful the overall effect ended up being.

I will admit that these curtains didn't "need" tassels with such a bold pattern and the finished effect of the cornice box, and at $45 for the 5 yards I needed, this was not a super cheap change.  But I think sometimes these subtle bits and pieces add up to a lot of impact.

I also think trim could be used to jazz up inexpensive curtains for a very custom look.

Take a pair of basic ikea curtains for about $20, add this pom pom trim on both sides of the panels,


and you have your own version of these anthropologie Toorie panels.


Or add these ruffles (they come in lots of colors)


 in vertical strips a couple of inches apart and you have something like these panels from Urban Outfitters.


Run your ruffles horizontally for this effect, a la Land of Nod


(if you did several rows on floor length curtains, these would be worthy of a grown up space.)

Go over the top fabulous with layers of box pleated taffeta trim and pretend you run with Miles Redd.


Okay, not quite the same thing (his is silk organdy, inspired by Oscar de la Renta couture gowns) but you could get something of the look for less.  As an aside, this is one of my favorite bedrooms of all time.  Seriously, I would take it in a heartbeat.

Okay, back to embellishing curtains.  I also like the idea of getting a little exotic.  How about linen curtains with short beaded fringe for a sort of tribal look?


Or feathers??!!


(Truth be told, I tried to get my mom to go for some feather trim on curtains in her guest room.  If anyone was going to go for feathered curtains, I would think it would be my mom, but no dice.)

For a more sophisticated take, you could add a simple tape inset from the edge.  Maybe a greek key or a classic scroll?


Come to think of it, I kind of like that scroll for my chartreuse silk curtains in the dining room....

I think trim might be a love it or hate it kind of a thing.  Which side do you fall on?

Tuesday, July 5, 2011

Sheers

Sometimes a quick change can make a huge difference in a room.
Take our dining room.  One of the first rooms to be "finished" in the house, there was one little thing that was driving me crazy: the totally practical, totally expensive, total eyesore of a Hunter Douglass blind.


See how I tried to hide it in this picture?  Yeah.  Wait, here it is:


Here's the thing: this guy is a workhorse and completely logical for the space.  Our huge dining room window looks right at our neighbor's front porch, so blocking the bottom half of the window gave us privacy while allowing in a good amount of light and preserving a view of the beautiful white pine.  Yet I have never liked these shades.  I think they're ugly: there, I said it.  They were installed by the previous owner (or the builder), and because they are high quality and pricey, I felt like I had to just live with them.

When summer hit, I found myself opening the blinds more and more for all that light and green, just as the neighbors were spending more and more time outside.  If they are on their porch and we are sitting at our table, it's like we are all at the same party but giving each other the cold shoulder.

On my next trip to Ikea, I grabbed a pair of sheers with a sort of swiss dot along a line.  I put them up just with their tab tops to see if I like the effect.


See the neighbor's house?  Told you it was awkward.  But now, I love the way I can see out without it ever feel like I'm staring at anyone, and I love all the nice soft light.  (I can also open the sheers and use the blinds for a combo of privacy and direct light, as before, but I haven't wanted to do that even once since putting these up.)  Now I just need to decide whether to put them on rings on this rod, pinch pleat them, get a double rod, leave them alone.  I think I'll leave them alone for now and give it a good think.

I recently read something about the return of sheers--possibly in the new House Beautiful, but I can't seem to pin down the source.  The designer was basically saying that with our current desire for light and a good indoor-outdoor connection, sheers are the way to go.  I think I agree.

What about you: would you do sheers?  Do you like the look of layered window treatments?

Saturday, July 2, 2011

Small Measures: Ombre


Loving the breezy boho feel of dip dyed curtains.  Ikea, white (lace? swiss dot?) plus dye.  Dip and dry.  With words to spare.

Tuesday, June 14, 2011

A loose end, and an award

I have been asked how I keep track of all the tearsheets (and sources!) that I pull from magazines, and while I have no real system, it helps that I tend to recognize the shape of the page and the font of the page numbers to identify the magazine from whence they came.  Usually I can find what I'm looking for.  But sometimes not.  (Anyone have a good secret they want to share?)  A long time ago, I blogged about choosing curtains for the dining room, and the way my preference was wavering between a parisian pleat and a more structured (and more formal) box pleat, only I couldn't find the Domino image I had in mind for the box pleat.

Well, all these months later, I found the picture.  Here it is.


Isn't it lovely?  I'm still digging the lavendar and sort of pale silver palette, the scale of the pattern on that rug, and the texture and detail in that Moroccan wedding blanket on the sofa.  Also, Breakfast at Toast just did a round up of the English rolled-arm sofa, here, and it's feeling fresh (and classic) to me.

And while all this may not make for the most interesting blog post, I have to say I feel pretty satisfied.  You may think it's crazy, but it was really bugging me that I referred to that image here and then never posted it.

Also, a big thank you to Susan at Project Balancing act for awarding me the Kreativ Blogger award!


This award comes with the mandate that you get to know me a little better.  I've already posted my "seven things you don't know about me", here, and while I could come up with seven more they would likely try your patience more than this post.  Instead of that, you should go check out Susan's blog, here.  Thanks for the shout out!

Wednesday, May 18, 2011

So You Think You Can Sew a Curtain

In this era of DIY, more and more people are going for the "Effect" of window treatments (And other decorating staples) over the real thing, and while I applaud the efforts and ingenuity of the people getting it done with hem tape or (as I have, admittedly, done long ago), staples, pins, or glue, I think something gets lost when craftsmanship dwindles.

Its like this: my new hairdresser is okay, but my old one was awesome.  The difference?  The new one can block in the shape and generally tame the curls, but the old one delivered the most detailed cut you can imagine, and it made the difference between passable and Where Did You Get Your Haircut?

Our local Half Price Books has an amazing design section (which I am banned from until further notice--every time I go in I spend at least $50.  $50 worth of AMAZING DEALS, but $50 nonetheless).  Case in point: the other day I picked up The Curtain Design Directory, 4th edition, for $4.98, and I have been poring over the vast collection of styles ever since.  (Just to give you a sense of scale, the book is 328 pages, with, in most cases, one style of curtain per page).

Perhaps the greatest thing about this book is the illustrations: simple line drawings that allow you to see the curtain (and accoutrements) rather than getting hung up on the fabric, color choice, etc.  While many of the styles here are quite formal and nowadays many people want a simpler,more pared down look in their homes, it has me wondering where I can put another pelmet box, valance, or tassle trim.


Don't you just love a book that is full of possibilities?

For those of you without a sewing machine or the inclination to teach yourself pinch pleats (it's not so bad, I swear!), there are lots of options.  Last time I was at Joanns, I picked up a little flyer about their new design services--you pick all the materials and styles, they sew them for you.  Same deal at Calico Corners, though of course their fabrics start high and then skyrocket.  Locally, my sister-in-law runs Union Place in Excelsior, where they have been making gorgeous window treatments and upholstery for 3 decades or so.  (Yup, sometimes I go in for a little nepotism).

Of course, you can also ask your clothes tailor if they do work for the home: if they don't, they might have a recommendation, and often the mom and pop shop offers better value than the big chains.

Thursday, January 20, 2011

Dining Room Curtains: After


[Here's the dining room before. See how the room really called out for curtains? Feels unfinished an a bit cold. The Phillipe Stark Ghost chairs are our our old dining room chairs, and that chair on the end was out on approval. I did not, in the end, approve of it, and love the teal eames chairs, which ground the space much better than the white.]


I am usually a rule-follower. I read rule manuals for games and can be quite a stickler, I would always abide by formatting rules for papers in college, and it makes me nervous to turn when a sign declares no turn on red, even in the middle of the night when clearly no one is around. There are two major exceptions to this tendency. In baking and in sewing, two realms that actually require precision, I'm an eyeballer, a wing-it kind of a gal. When trying to make proper curtains for the dining room, I tried my best to follow instructions. I learned the hard way (my favorite way, I suppose), why a number of common practices are, in fact, common. While readers of this blog may have the budget and the good sense to hire a professional, I thought I would share my mistakes with those who might want to do it themselves. I am not going to go through the whole curtain making process--there are many, more qualified sources out there. Instead, consider this a list of warnings or addenda to keep in mind as you work through instructions from a professional source. Also, if you are a professional, do not cringe! Instead, leave a comment with any added tips, if you care to share trade secrets with us DIYers.

1. Plan your project in advance and buy the right amount of fabric.
This might seem like a no-brainer, but for some reason I have never considered a curtain that might be wider than a single width of the fabric as it comes. By the time I realized that the dining room curtains needed more fullness, there was a distinct danger that I might not be able to get another six yards from the same dyelot, especially since I bought by silk at a discount warehouse. Upon returning to the store with the existing silk in hand to match, I circled the silk section in panic. It appeared that my bolt was gone. Finally, after digging through hundreds of bolts, I found the remainder of the original bolt, and--thank goodness--it had six yards left on it. But this could have been an unhappy ending.

Any drapery book will have instructions for measuring, but basically you need the full length of your curtain from rod to floor, plus eight inches for the hem, plus about four inches for the heading (depending on heading type), and most curtains that you plan to actually close should (as opposed to stationary decorative panels) have 2 1/2 times fullness. This means that your fabric, when laid flat, is 2 1/2 times the width of the opening it needs to cover.

Here's the fabric as I'm getting used to it. Feels a bit skimpy.


2. Do not hang your fabric up "just to see how it looks"--for weeks, or even months, at a time (see photo above!)
Again, perhaps obvious. But sometimes I need to live with something for a while before fully committing. (Which is funny because I almost always commit in the end. You'd think I could skip those extra steps.) Anyway, as I learned, leaving the fabric unceremoniously hung by clips or pins can warp the fabric. My project included two panels, each with two widths of fabric. The panel made from the original silk, which had been hanging up while I mulled it over, was much more difficult to deal with than the fresh silk. The side hems were almost the end of me because of the uneven pulling and the near impossibility of pressing an even hem.

3. Measure before you start
I went ahead and assumed that the people at the fabric store had measured correctly. Turns out one persons 6 yards can be another person's 6 1/4, and that's a mighty big difference. Because, well, sewing is precise. Following directions, I went ahead and put in hems first, then side seams, THEN measured from hem to top to make sure my two panels were of equal length. Guess what? Not only were they NOT of equal length, but one of them was TOO SHORT, leaving me with a couple of bad options: lower the curtain rod or take out the hem and redo it with a much smaller allowance. It would have been more pleasant to make an informed decision in the beginning than to rip out 7 feet of seams from silk. Also, I could have gone back to the store to complain that I had not gotten the right yardage.

4. Square your fabric
Another step I skipped, and regretted skipping. Okay, I didn't skip it, but on the first panel I half assed it. Here's the thing: you can't eyeball square. It's simply not possible. Do it properly from the beginning.

5. Trim the selveges
Selveges are those woven edges that basically keep the fabric from unraveling. I'm always thought they were kind of useful in keeping things in line, but in this project I discovered that, with delicate fabrics in particular, the selveges may again pull in an uneven way. Trimming them just before you pin and sew a seam makes the pinning and sewing much smoother--literally.

Looking at this list, I'm not sure there's much I did RIGHT. Also, I realize in hindsight that 9 foot, double width curtains in silk is perhaps not the place to start when learning to pinch pleat, but remember? I'm the one who learns the hard way. (If only I could learn that lesson--not to learn things the hard way.) The good news is I applied some of these lessons to my other curtain projects for the house, and the curtains for the girls room came together quickly and beautifully.

Here's the other thing: there are NO instructional videos out there for "tiny soft pinch pleats," "fan pleats," or "parisian/french pleats." My drapery book just said to proceed as for pinch-pleats, only pinch the fabric at the very top. So I took that for what it was worth, and ended up with this.

Happily, I am loving the results, and feeling very proud of my handiwork. I think I got the effect I was going for.


Even if one panel has a proper 4 inch hem and the other is more like an inch. Even if I did the pinch pleating a couple of days apart and didn't write down what I did the first time, leaving me with a more free-form pleat on the second curtain. You know what? No one sees that but me. And any of you, now, if you come to my house.

Tuesday, January 18, 2011

Choosing Curtains

My husband does not believe in window treatments. He thinks that windows should have nothing on them, or, at minimum, a utilitarian shade for privacy or light blockage. When building the cornice for the girls room, I tried to engage him in a discussion about the height and shape of the thing, and he finally shut me up by saying, quite simply, "I don't want a cornice. Before this project, I didn't know what a cornice was."

I, on the other hand, believe in the power of a good curtain (or roman shade, or valance, or whatever suits your fancy; I draw the line at swags), and I think they are all about effect. Let a shade do the dirty work of sun protection. Curtains bring color and warmth, pattern and drama to a room. For years, if I couldn't find a store-made curtain that I liked, I simply bought some fabric and pinned it up to a rod, always intending to sew it, but never getting that far.

When we moved into this house, I was determined to do things properly. To finish projects. To aim for a certain polish in addition to effect. I was also determined to try to walk the line between the clean, minimal lines of the house and my own maximalist tendencies. I decided that three rooms needed curtains: the two upstairs bedrooms, which have more ordinary scale windows and needed some warmth, and the dining room, which has two half walls and is open to the kitchen and the hallway; curtains claim the hallway wall as part of the dining room to make it feel much cozier and finite.

I went looking for charteuse velvet (the (older) man at the fabric warehouse called me a "wild woman") but came home with yards and yards of chartreuse silk, which in the end I am loving for the sheen and weightlessness. I realized that finishing projects requires many decisions about details, and while I had fabric, I had no plan. I dug up the drapery how-to book I bought a decade ago when I first planned to sew proper window treatments and looked at the drapery options. I learned the difference between pinch pleats, butterfly and goblet pleats. Armed with this lingo, I turned to my trusty stack of Domino magazines and looked for curtains that evoked the mood I was going for: opulent without being fancy; a little flyaway and footloose. I liked the way some designers played down a fancy fabric with a casual treatment, like these grommeted silk draperies in the living room of Ashley Starck.


[Domino]

While I admire this choice in this room, I happen to dislike grommeted panels in general, so found myself drawn to an upscale, dorothy draper-like box pleat. I have now torn the house apart looking for this particular tearsheet--it is from the Domino guide to rugs--but have so far been unsuccesful. No matter, I realized that, as an amateur seamstress, I best not attempt such a tailored style: it would certainly give away every mistake.

I loved these, in a room decorated by Julianne Moore:


[Domino]

But wanted to challenge myself to do something beyond the pole-pocket top. (These curtains did, however, reconfirm my decision not to line the silk. Again, much less formal that way!)

Finally, I landed on this fabulous room in designer Fawn Galli's Brooklyn town house:

[Domino]

and fashion designer Nanette Lepore's insanely hot living room and family room.


[Elle Decor]

Perfect. But I couldn't find the name of this style anywhere, and without the name, how's a girl to google how-to videos? Finally, in the Domino Book of Decorating, I saw this useful chart:


Found! I was after a "tiny soft pinch pleat." At Calico Corners, I looked at their sample draperies and found that they had a sample with something similar, called a fan pleat. Finally, in another drapery book (studied at length sitting on the floor at Hancock Fabrics), I found that this look might also be called a "french" or "parisian" pleat. Who knew? I love that the Domino guide calls this a "bohemian" look, much more laid back than the traditional pinch pleat (if a silk floor to ceiling curtain can ever be laid back?)

It's always amazing how much thought, energy, and research can go into one very small decorating decision (I suppose this is why trained designers get the big bucks: they already know the difference between a parisian pleat and a pencil pleat). But making such deliberate choices make a difference. I also find it hilarious that I got Dave to look at tears of different styles of curtains and to actually weigh in. This was EARLY in the decorating process!

Check back in the next day or so for the next part in this process: planning and sewing. I promise, all the effort paid off.

LinkWithin

Related Posts Plugin for WordPress, Blogger...