Tuesday, May 31, 2016

Hanging Art: The stacked pair

Fun fact:  my design career really started with some art walls.  When I first started this blog, a couple of readers got in touch and asked me to hang artwork for them.  Then we started to work on other projects in their homes.

My background is in the arts--I have a Master's Degree in Modern Art and Curatorial studies from Columbia, I worked at a public art organization in NYC for nearly 6 years, and I am still on the board of Public Art St Paul--so I suppose it's not surprising that the art is one of my favorite parts of any project.

The more I use art to finish spaces, the more I think about the ways we can be strategic not just with the type of art we choose, but the way we hang it to polish a room.

One of my favorite tactics is the stacked pair.  Stacking an actual pair is pretty fool-proof, and it can be a great way to fill all of those narrow spots in a house.

My powder room, above the toilet:


My old guest room:
(a foolproof way to do a mismatched pair: two from the same artist, in the same medium, like these fashion illustration watercolors)


Clio's room:
(these are pieces from 2 different artists, but both are black and white line drawings in gold frames.)


The stacked pair is also a great way to visually balance a tall piece of furniture, like we did in this home:


With the library shelf, the stacked pair helps flank the window--the largest element in the room.  The pieces are from the same artist, in identical frames:


In Eleri's room, there isn't space for nightstands on both sides of the bed, but the bed felt imbalanced without a second lamp.  Enter--you guessed it!--a stacked pair.


In my living room, the window is off center on the couch.  To bring symmetry, I used a pair of side tables topped with a pair of lamps--and filled in the white space next to the window with a pair of 1970s portraits.


Advanced move: on this landing, I needed to balance the height of the gallery wall.  The stacked pair was an orderly way to get the height we needed.


I repeated the same stacked pair facing this one, to "end" the gallery wall:


I do love symmetry, balance, and pairs.   Most pairs in a room (chairs, tables, lamps) run on a horizontal plane.  A stacked pair gives the same balance, but since it runs vertical there is a new sense of movement.

Other posts in the works for this series: the row, the column, the flanking pair, and the butterfly.  Stay tuned.

Thursday, May 26, 2016

The road to the magazine

A number of people have asked how the magazine feature came to be.  When I told them the backstory, many were surprised, in particular, by the timeline.  I worked in the magazine industry ages ago, so I kind of new it wouldn't be quick, but I was still a little surprised myself!

Here's how it went down:

October 2014 (Yes, 2014): I brought in a photographer, the very talented Melissa Oholendt, to photograph my house.  (That alone created a flurry of projects to "finish" the house.)  To find the right photographer I searched sites like Design Sponge for local home tours, then checked out the photo credits.  I loved Melissa's editorial framing and use of natural light, particularly in Emily Henderson's makeover of the Curbly house.

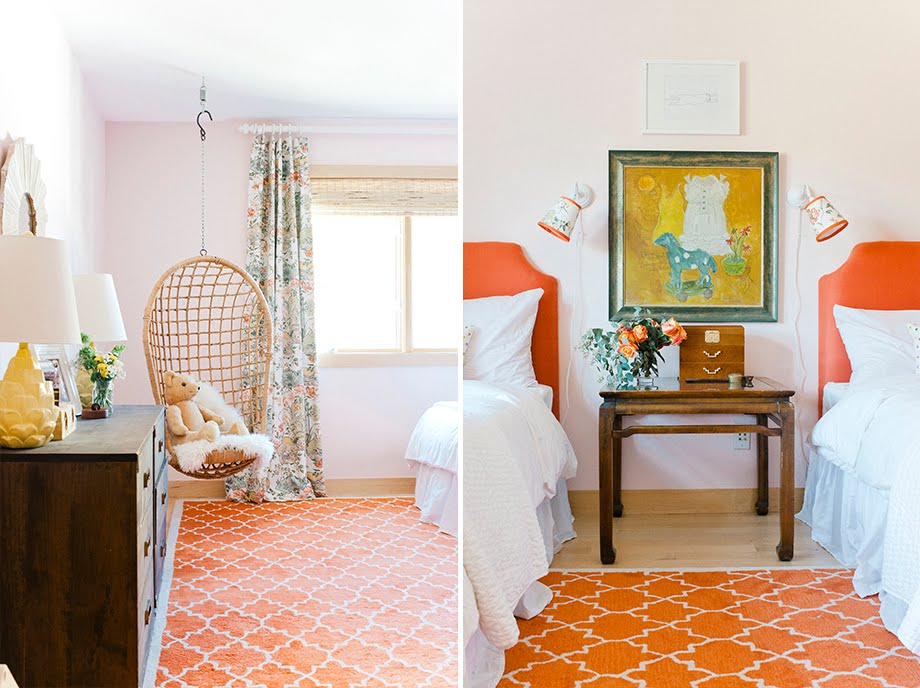
Our shoot was a one-day event, with me doing the prop styling and the flowers and a little art direction.  We shot everything with natural light which meant no light kits and a more minimal set up, so we could cover a lot.  Like EVERYTHING!  A few weeks later Melissa sent me a preview (below) and I about died.  Properly photographed, my house looked like it could be in a magazine!  This was a huge help to me--seeing it through someone else's lens gave me confidence.


Then I sat on the gorgeous photos figuring out what next.  I remembered this article from Sherry Hart, a veteran designer and (hysterically funny) blogger in Atlanta.  The blogging community is SO generous with information and advice!  In the article Sherry interviewed Lisa Mowry, the Atlanta editor for a number of shelter titles, and asked for tips on approaching magazines.  Based on Lisa's advice, I had my husband track down local writers/ contributing editors who worked with publications I thought would be a good fit for our house, and readied my pitch.

March 2015: I sent scouting shots and a list of "reader take away" ideas to the local writer.  She responded immediately and enthusiastically, and we set up a time for her to come by to see the house in person.  When she did, she brought her own camera to take additional images that illustrate how the rooms relate, to give editors a sense of where they could set up cameras.  Then she pitched two magazines we had agreed on, one regional and one national, which would give maximum coverage and would not be a conflict.

May 2015: I got an email from an editor at Mpls St. Paul Magazine, saying they were interested in featuring my home in their Home and Design magazine.  At the time, we talked about shooting within a few weeks for an upcoming issue.  After various emails with two editors over the course of maybe 2 months, we scheduled a shoot with one of their photographers.

July 2015:  The shoot!  Cancelled!  Due to illness.

August 2015: The shoot!  For real!  I did the flowers myself and much of the styling, so I didn't get much in the way of behind the scenes photos.  It was pretty amazing to see the computer set up--especially since my time working in commercial photography was just on the cusp of digital.  Most shoots I worked on still used real film, and we literally didn't know what we had until the photos were developed.


At the time of the shoot, the plan was to be in the March 2016 issue.

January 2016: Moved to the June issue!  Then August.  Then back to June.  I share this because it's so interesting when you think of the complexity of a magazine--it's like a puzzle and all the pieces need to fit.

March 2016: Kelly Kegans, the executive editor of the magazine and the writer for the story, sent me interview questions, some clarifying a bunch of stuff we talked about on the shoot, some new.  I put together a resource guide for paint colors and sources for items in my home (which is in the back of the magazine).

March 2016: I heard from an assistant editor at the national publication--a year after the initial pitch!  They wanted to know if I was still interested, and a feature is under consideration with them.  Fingers crossed!

April 2016: Kelly sent me the story (pretty much as it appears in the magazine) for fact checking

May 2016: It's out!


So all told, this piece was about 14 months from pitch to published.  There's so much that happens behind the scenes--and this is just from my point of view as the subject.

I'm thrilled with the piece and so appreciative that MSP magazine saw something in my home and was willing to put their resources into sharing it with the people of Minnesota.

Hop you enjoyed this little behind the scenes!

Wednesday, May 25, 2016

On being published*

Nearly a decade ago, not long after my husband and I moved into our row house in a nowhere neighborhood in South Brooklyn, a friend from work came to a party we threw--I forget the occasion.  I remember her parting words, though, quoting our mutual friend and colleague, a woman with impeccable taste who had recently been to our new digs: "Oh, Sarah said it looks just like a magazine."

Now, to be fair, it truly didn't, though it did have something authentic going on.  (See here and here and here.)  But I think on that night, this seed was planted.  For years I had lived with a roommate who worked for Metropolitan Home Magazine and wrote design books for Pottery Barn, but it never occurred to me that a "regular person" could have their home published--that I could have my home in print.  Until Maureen uttered those words: Sarah said.

Of course, nowadays there are a million more opportunities for "regular people" to be published.  The internet abounds with home tours.  It's fun that we get to peek inside so many homes, so many styles.  But there is still something irresistible about a glossy magazine.  (I LOVE shelter magazines and have forever.)  So when my home came out in Minneapolis St Paul Home & Design magazine last week, I was feeling all the feels (as they say in the interwebs.)

I believe the piece will eventually be online in some form, and we are working on the press section of the new website where we will include proper scans so the article is legible, but for now, here are snaps of the 4 spreads.  (Also, if you want a copy--I'm looking at you, dad--you can order here.)


Of course, now I'm like a print-magazine addict and hope this will be the first of many wonderful pieces on my projects!

A girl can dream.

-- Heather

* A note on the post title.  For years I wrote a "mom blog," and whever I was feeling particularly reflective, the post was "On" the topic.  It felt apropos here.

Monday, May 9, 2016

Before and after: my new logo!

There's nothing like a deadline to get your butt in gear.

"New logo" has been on my to-do list for months.  Well, okay, years.  The upcoming publication of my home in Mpls St Paul Home and Design magazine (my first glossy!) finally put a new visual identity and a real website in high gear.

My current "identity" was created by a lovely young designer I met through my last job at the Lighthouse Writer's Workshop in Denver, Colorado.  Her work is quite whimsical and vintage-inspired and perfect for the style and vibe of that organization.  I mainly hired her because I liked her and thought she did good work--I didn't think much about whether our styles aligned.  When I approached her about working with me, I remember pretty specifically instructing her that my blog banner and business card should be colorful, approachable, and--get this--not too professional.

Why?

Well, at the time I was hanging out my shingle without real experience in the field.  While I had tons of applicable skills from previous career turns, a great "eye," and years of practice from my own decorating habit, I was highly sensitive to feeling like a "fraud."  I didn't want anyone thinking I was setting out bigger shoes than I could fill.

Now, with a portfolio I am pretty proud of, lovely press (some forthcoming, some pending), and some really great projects in the works, I'm feeling pretty legitimate, and it was time to switch to a logo more reflective of my career now.

Enter 99Designs.

My Aunt Missy first told me about them when she created a logo for her photo blog and work as a photographer.  It is a site where hundreds of designers can submit work for consideration in design "contests."  You select your package (I just did logo design, but you can go for identity, website, etc.), your prize level (I chose "gold"), and write a creative brief.  Then the designs start rolling in!  And roll in they did.  It was crazy--I received a total of 433 submissions. (!!!!!!)

This was a good approach for me because I didn't know quite what I wanted, and having a ton of variety to react to was super helpful in fine tuning what I was after.  I knew I wanted it to be sophisticated but approachable, I liked the idea of a "mark" of some kind, and I wanted it to be clean and modern.  But that can translate a zillion ways.

The other thing I knew was that it was time to put myself front and center.  It was time for Heather Peterson Design, not Love Your Space.


Remember my old design?


Yeah.  My actual business name wasn't even on my business card!  This, too, reflects my discomfort with BEING the brand.  When I worked on the initial blog banner and business card, I wanted to hide behind the tagline.  The funny thing is, I'm not just realizing this in hindsight.  I'm pretty painfully self-aware, and I knew my motivations for what they were at the time.  Thanks goodness that my husband and my good friend Sara insisted that I register the business (And buy the URL) Heather Peterson Design!  Of course they were right, and I finally feel like I've grown into it.

When it came to choosing a final design, I turned to Dave and Sara again, and they were, again, in total agreement about the choice.

I was leaning towards some of these guys:


I think these are BEAUTIFUL logos.  But in the end, the first three felt like they were a little backwards leaning, like cleaner takes on what I already had.  The last one felt maybe just a little TOO clean and modern?

In the end, I'm THRILLED with my choice, which feels like it looks forward, towards the career I am building.  It looks beautiful in all the colors the designer specified--a grey, a blue, and a rose--and she gave me a secondary mark as well.  It is beautiful in white on a color or over an image.  It is clean and modern but not TOO simple.  It speaks to my love of pairs.  Plus, if you've been reading for a while you might know I am partial to the parenthetical expression.  :)


Mostly, it just feels amazing to have this professional look that aligns with the work I am doing.

So cheers to good progress!


Wednesday, May 4, 2016

Before and After: Tangletown Traditional

My husband and I are back on the photo shoot bandwagon!
I shared peeks of this transformation on Instagram last summer when everything was installed, but the full before and after is so much more fun.


Come on in to this GORGEOUS 1920s house in Tangletown.  When my clients moved in, it had received some "updates" that really weren't in keeping with the era of the house, and despite many lovely architectural details, the center hall felt a but unfinished.

Our goal: to restore the central public spaces of the home to full glory.  (And to refresh the small powder room until a full remodel happens down the road.)  To do that, we added wainscoting, wallpaper, new lighting, a wool stair runner, traditional window treatments, and elegant furnishings.  We knew the panelling was the right move when all visitors failed to notice it after the work was done!  It belongs so well, it looks like it has always been there.

Okay, before:


After!


Before:


After:


The Entry Before:


and After:


 Radiator in entry Before:


After:


Stairway and landing before:


And after:

(I think the carpet is the one thing that didn't photograph well--MUCH prettier in person!  But the pattern reads well here, so there's that.)

Stairway Before:


And after:


The landing before:


After:


The back bathroom before:


And after:


A few more details:


(love the mix of a reeded wood pole to connect to dark wood banister, with gold end cap and rings to tie in with the new gold lighting.  Also,  The embroidered vine-patterned fabric was really hard to capture!)


I always love a reason to paint a ceiling! 


Next up: the sunroom!  Think patterned cement tile and built in banquette.  Hopefully this summer.


LinkWithin

Related Posts Plugin for WordPress, Blogger...