My impatient streak continues. I'm going to show you a nearly-but-not-quite-finished project that is completely unstyled. Heck, we didn't even clean up before I snapped these pictures.
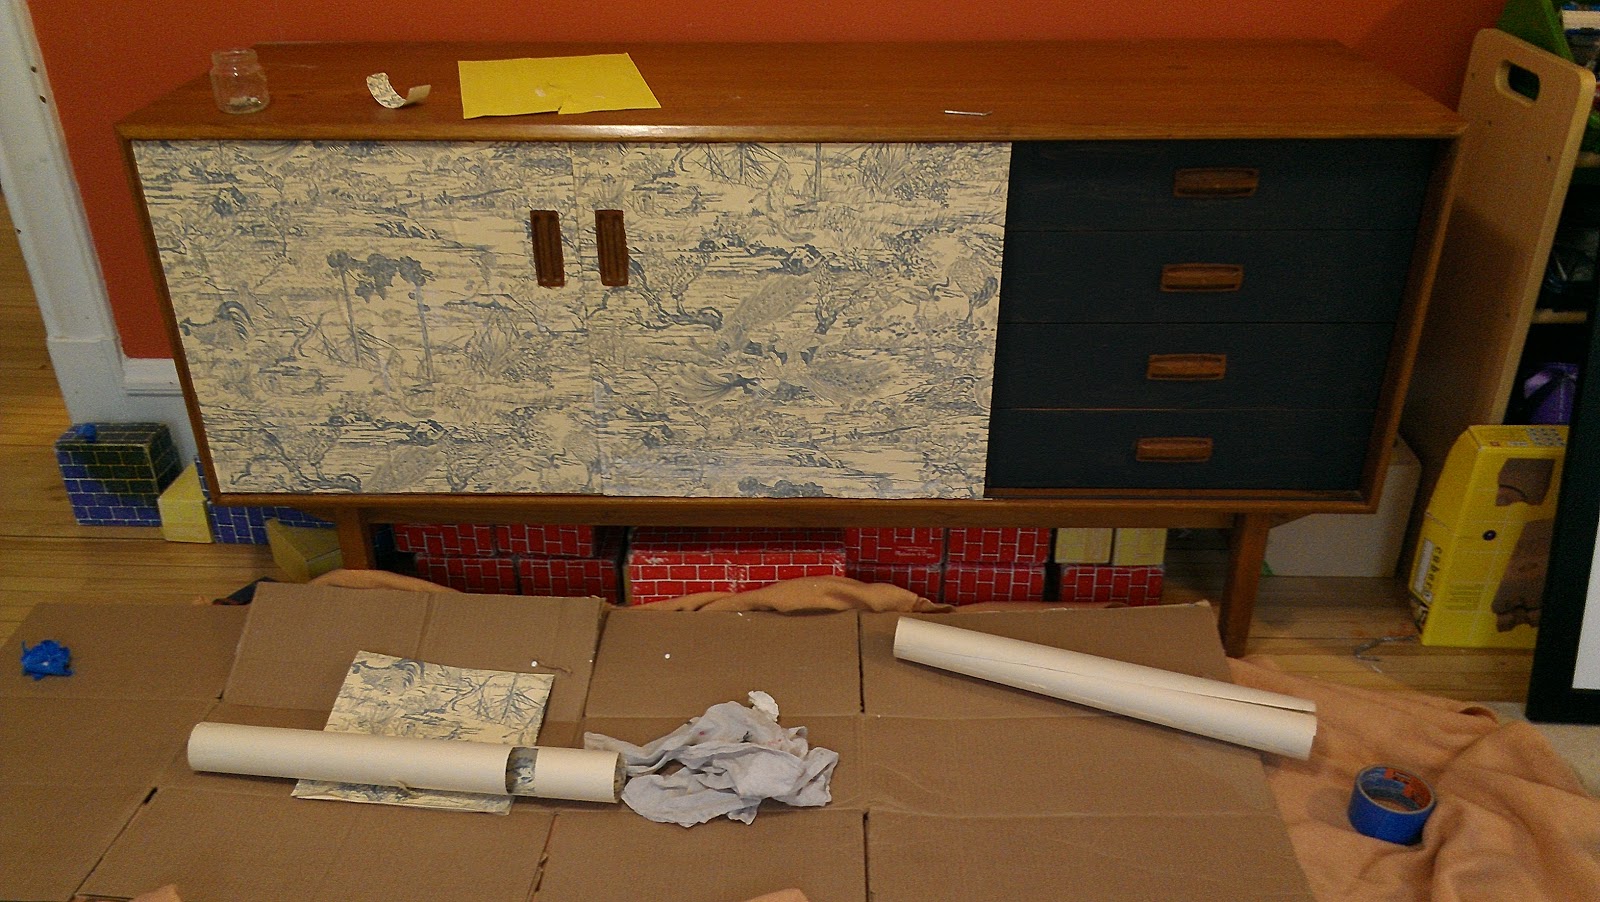
My client had this old mid-century console that was in rough shape. Her dad refinished the exterior, but the doors and drawers were a mess, and my client wanted to transform it into a quirky statement piece for her family/play room.
Enter vintage wallpaper and some leftover navy chalkboard paint.
So cute, right? I love that the wallpaper has lots of movement and a cream background to lighten the piece. And leaving the pulls in their natural wood state connects the front of the piece to the outside.
After testing various adhesives on a piece of plywood at home, we ended up using mod podge, both under and over the paper, and are pretty happy with the results. I did not take step by step how-to photos, but I can try to break it down another day if anyone would like to try this at home.
Hey, don't forget to enter the Novica giveaway!
Friday, November 16, 2012
Sneak Peek: console DIY
Thursday, November 15, 2012
Give thanks: Giveaway!
I'm back from New York, sated by all the good food, good company, and good work, and celebrating with a giveaway!
I'm always a big fan of energizing a space with treasures from afar. Thanks to to good people of Novica, you can find goods from around the world, made my individual artisans, without ever buying a plane ticket. (Though of course if you can afford to travel and bring home treasures directly, do it!)
There is a LOT on Novica--so much, in fact, that it can be a little overwhelming if you're not sure what you are looking for. That said, you can search by item type, country of origin, individual artisan, etc. If you DO know what you're looking for, you will quickly find a ton of great items at your fingertips.
GIVEAWAY DETAILS
The prize: a $75 gift card to Novica
I had quite a lot of fun going through the site and picking some favorites at that price point (or less: keep in mind that you'll have to pay shipping as part of the gift card if you win.) (Okay, and for some reason I always seem to include one item that is way off the price point. Can you guess which one it is here?)
With so many home goods, clothing items, and fabulous jewelry to choose from, there is totally something for everyone.
So enter! It's simple.
1. Follow this blog and let me know about it in a comment
2. Post the giveaway to your blog, facebook page, Google+, or twitter feed, and leave me one comment for EACH (if you want one entry for each.)
Giveaway ends on Wednesday, November 21 at midnight central time, and winner will be announced on Thanksgiving. Contest is open to anyone living in a place where Novica sells and ships merchandise.
Questions? Email me heather[at]heatherpetersondesign[dot]com
Go browse, and enjoy!
Tuesday, November 13, 2012
Making the most of dated tile (sneak peek)
Last week I posted a sneak peek of the guest room I am working on at my parents' house--a room which happened to be my high school bedroom, all decked out in pale green and peach.
Guess what? There is an ensuite bathroom in peach and green, too. Back in 1990, tinted grout was the latest and greatest, so fast forward a couple of decades and my parents have some seriously dated--and seriously fixed--design choices to contend with.
So how do you update a bath with dated colors without ripping it all out?
Wallpaper, of course. We chose a dramatic, look-at-me paper to draw the attention away from, well, everything else. Here's the key: you need to pick up the colors from the tile, but also incorporate other colors from the house. When my parents redecorated other spaces about 10 years ago, they introduced a lot of red, gold and chinoiserie accents, so we found a paper to reflect that. The peach and green in the paper actually make the peach and green tile make sense, and this is gorgeous as it relates to the rest of the house.
Guess what? There is an ensuite bathroom in peach and green, too. Back in 1990, tinted grout was the latest and greatest, so fast forward a couple of decades and my parents have some seriously dated--and seriously fixed--design choices to contend with.
And just in case you're looking at it thinking "That's not so bad..." I give you a close-up.
So how do you update a bath with dated colors without ripping it all out?
Wallpaper, of course. We chose a dramatic, look-at-me paper to draw the attention away from, well, everything else. Here's the key: you need to pick up the colors from the tile, but also incorporate other colors from the house. When my parents redecorated other spaces about 10 years ago, they introduced a lot of red, gold and chinoiserie accents, so we found a paper to reflect that. The peach and green in the paper actually make the peach and green tile make sense, and this is gorgeous as it relates to the rest of the house.
What do you think?
I can't wait to bring in the right towels, bath rug, and accessories to finish it up.
Monday, November 12, 2012
Three Ways
I'm feeling blessed to be here post-storm, for a beautiful weekend with friends and family.
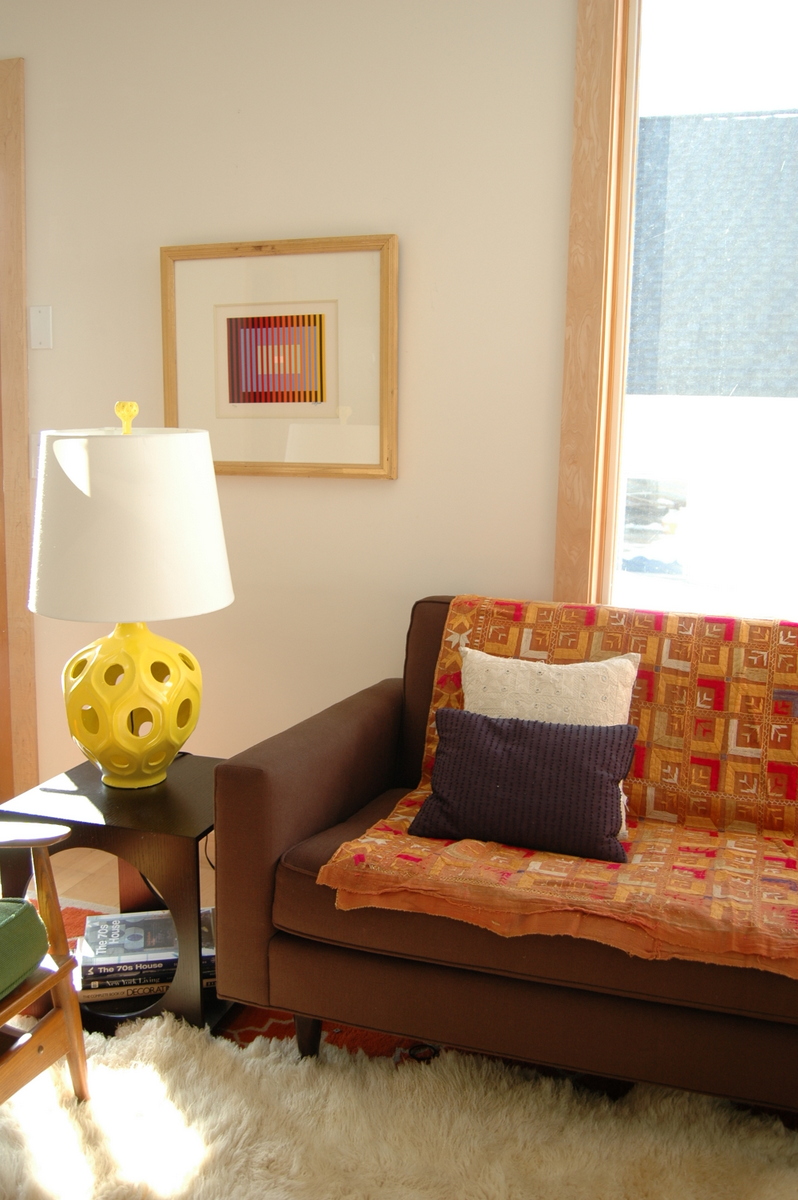
Before I left home, I was digging through my photo archive for another post, and I came across these images of my living room three ways. These were taken a LONG time ago, when I was experimenting with different art and accessory choices for an overall look/feel. The room feels so unfinished to me now without curtains or some of the other layers that have emerged over time, but it's still fun to see how you can produce various vibes around one major piece, like our brown Bantam couch.
In the end, I'd say the living room has progressed in a more eclectic, sophisticated way, and looking back makes me love what it has become.
I think the lesson is that there's no "right" or "wrong," and playing around with all the pieces you have to work with can sometimes yield surprising results--or teach you what your style really looks like.
Am I alone in this? Or do you play with your stuff this way, too?
Friday, November 9, 2012
Sneak peek
I've been working on my old bedroom at my parents' house in bits and pieces. While it is not quite done (I need to sew the curtains and hang the art!), I'm getting impatient and showing you a peek.
Somehow, I don't have a good before picture. (Well, without digging through my high school albums, anyway.) My parents built the house in 1989-1990, and they let me decorate my room back then, too. My 16 year-old self went peach and mint all the way, with matching custom chair, bedskirt, and shams in a very trendy abstract reminiscent of splatter paint.
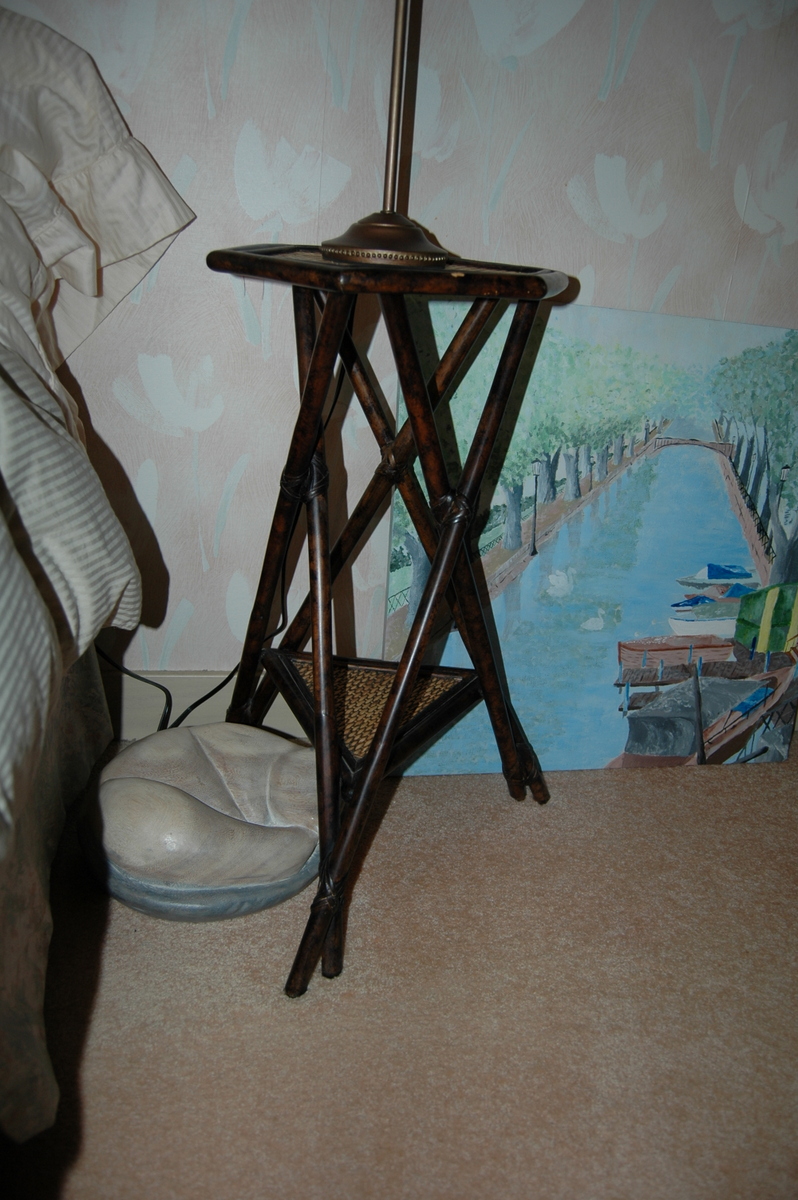
Nice deco styling on the chair, no? The wallpaper--an abstract tulip motif--was the same as my previous bedroom, but in a different colorway. Over the years, random bits and pieces were added to update the space (and to fill the gaps when I inherited the armoire and headboard from the set in this room, which has been my parents in our old house. Did you get all that? You know, this headboard and that armoire.) For example, my mom added bamboo side tables.
(Oh, you mean this bamboo side table?) Apparently, if it weren't for awesome hand me downs, my house would be basically empty.
Anyway, we finally had the room painted last week, and here's where we are at.
Somehow, I don't have a good before picture. (Well, without digging through my high school albums, anyway.) My parents built the house in 1989-1990, and they let me decorate my room back then, too. My 16 year-old self went peach and mint all the way, with matching custom chair, bedskirt, and shams in a very trendy abstract reminiscent of splatter paint.
Nice deco styling on the chair, no? The wallpaper--an abstract tulip motif--was the same as my previous bedroom, but in a different colorway. Over the years, random bits and pieces were added to update the space (and to fill the gaps when I inherited the armoire and headboard from the set in this room, which has been my parents in our old house. Did you get all that? You know, this headboard and that armoire.) For example, my mom added bamboo side tables.
(Oh, you mean this bamboo side table?) Apparently, if it weren't for awesome hand me downs, my house would be basically empty.
Anyway, we finally had the room painted last week, and here's where we are at.
(The carpet is eventually going. Oh, and I blogged the chair transformation here.)
Here is a progress shot with the new furniture and bedding but with the old wallpaper.
Doesn't that deep wall color just make ALL the difference?
More details on the projects and sources if (when!!!) I ever finish.
Next week: more peeks, and a giveaway.
Enjoy your weekend!
Thursday, November 8, 2012
Clutter, be gone!
There's nothing better than a skirted table to take your pantry from hot mess to hot stuff.
(Oh, man, did I just write that? And am I going to leave it? I guess I just did.)
I spent a chunk of Tuesday with a client working on some projects around the house, and I think we're both feeling good about the transformations. Her older house has a great pantry, big and light filled, at the back of the house, visible from both the kitchen and the railroaded living room and dining room. She installed an old Ikea table for some surface area, but underneath the table was a radiator and the typical recycling disaster. (Minneapolis currently has SIX SEPARATE CATEGORIES of recycling, though I here this is changing soon.)
She actually saw this post and suggested we do something similar at her place, and she had a specific vision: polka dots. We settled on this fun fabric (but in Navy), but when she went to pick it up they were plumb sold out. Then I had a genius idea: why not use a shower curtain? At 72" wide, they are much wider than a typical curtain panel and would allow us greater fullness without seaming a bunch of pieces together, and unlike raw fabric, several of the sides are already hemmed. Plus, the nylon fabric is perfect for a food environment where it can be easily wiped down.
This was a no-sew solution. We sliced the curtain horizontally across the middle and used hem tape (left over from Ikea curtains form my living room) to create rod pockets at the to hem the piece that had been the top of the curtain. (If you chose a rod-pocket style instead of grommets, you could skip that step.) A tension rod, and voila.
Super cute pantry.
As seen from the dining room. (Where we hung a giant gallery wall of family photos. The black frames echo the little skirt very nicely!)
(Oh, man, did I just write that? And am I going to leave it? I guess I just did.)
I spent a chunk of Tuesday with a client working on some projects around the house, and I think we're both feeling good about the transformations. Her older house has a great pantry, big and light filled, at the back of the house, visible from both the kitchen and the railroaded living room and dining room. She installed an old Ikea table for some surface area, but underneath the table was a radiator and the typical recycling disaster. (Minneapolis currently has SIX SEPARATE CATEGORIES of recycling, though I here this is changing soon.)
She actually saw this post and suggested we do something similar at her place, and she had a specific vision: polka dots. We settled on this fun fabric (but in Navy), but when she went to pick it up they were plumb sold out. Then I had a genius idea: why not use a shower curtain? At 72" wide, they are much wider than a typical curtain panel and would allow us greater fullness without seaming a bunch of pieces together, and unlike raw fabric, several of the sides are already hemmed. Plus, the nylon fabric is perfect for a food environment where it can be easily wiped down.
This was a no-sew solution. We sliced the curtain horizontally across the middle and used hem tape (left over from Ikea curtains form my living room) to create rod pockets at the to hem the piece that had been the top of the curtain. (If you chose a rod-pocket style instead of grommets, you could skip that step.) A tension rod, and voila.
Super cute pantry.
As seen from the dining room. (Where we hung a giant gallery wall of family photos. The black frames echo the little skirt very nicely!)
Wednesday, November 7, 2012
Testing (a really big gallery wall)
One of the challenges when it comes to design is the inability to "see it." Design is filled with leaps of faith: trusting that that little swatch of fabric will look good when applied to that (non-returnable) couch, that a big square of paint will translate to just the right feel you want in that room. The list is endless!
Of course, there are ways to mock something up. Wondering about scale? Build a scale(ish) model out of cardboard to see how it feels in the space. I once printed out a scale(ish) image of tile backsplash to see what it would look like with the repeat (which was larger than the sample.)
Right now I'm working on a really really big gallery wall. Really big. I feel like I can do these walls in my sleep (and love doing them), but when we are talking about over a hundred pieces to hang, you really want to think it through before you get out the hammer.
The wall is in a conference room that is 25 feet long, and to keep it from getting crazy we are filling a band about 4 feet wide that ends at table height. The pictures are all old family photos, printed in black and white, a mix of candids and portraits.
Do we:
1. Use all the same size frames (anchored by a pair at each end), hung randomly?
2. Use all the same size frames, hung in loose columns
3. Mix in some double and triple mat frames, and hang them randomly
4. A mix of frames hung in loose columns.
I played around with these layouts to visualize my plan (these mockups only represent a 16' wide wall--I ran out of space ont he page!). To help the client "see it," I found some reference and pinned it. Check it out here!
I have been working hard on projects, so stay tuned for some before and after, some how to, and a giveaway!
Thanks for reading,
Heather
Subscribe to:
Posts (Atom)